
DESN2804 Journal - Charlton Lane
Week 1
19/07/2021 - 25/07/2021
We had a lecture with Leo Martyn over Zoom. Leo gave an overview of the course and ran through the four assignments that we will have over the semester. The lecture content provided an overview of the 12 principles of animation followed by a demonstration of Maya’s UI and any important features for this course.
I've never used Maya or any Autodesk software before, however, I have used Blender for basic 3D modelling and I've seen the concept of animation curves in the Unity game engine, so nothing shown was too intimidating or unfamiliar. It's just a new UI to learn which may take some time. I've never used a rigged model or done any 3D animation so seeing that in the demonstration was interesting.
After installing Maya and reading through the provided content about 3D animation and the 12 principles, I decided to apply what I’d learned and make a simple animation of a cube bouncing with squash and stretch. This was helpful to quickly get familiar with Maya's controls and layout, specifically around creating keyframes and using the graph editor window, so I’d be prepared for the next week.
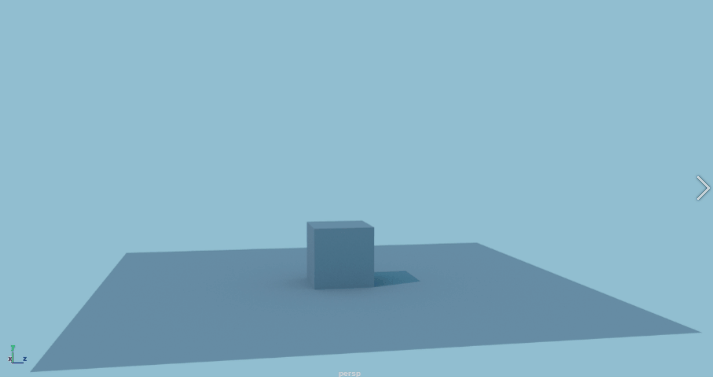
Basic test animation in Maya to learn the UI.
Week 2
26/07/2021 - 01/08/2021
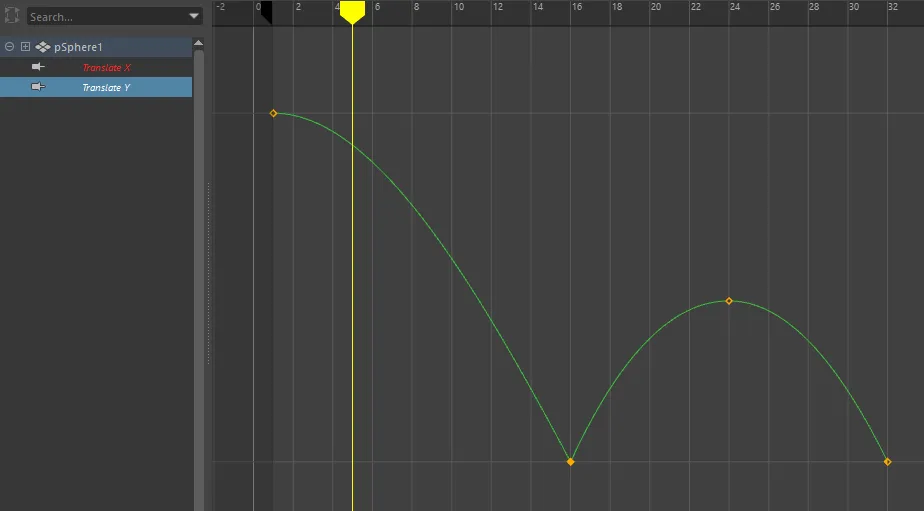
Example of animation curves in the graph editor.
This week was about using Maya to animate a bouncing ball. We used the animation principles of arcs and timing to make the ball bounce realistically. We used the graph editor window to manipulate the tangents of the animation curves to get believable results. One example of this is breaking the tangents of the Y value curve when the ball hits the ground to make it change direction sharply, without slow-out as it hits the ground.
You can see the result of this here. This animation only uses arcs and timing. There is no squash and stretch. Without squash and stretch, this ball feels rigid like a golf ball or even a bowling ball. The timing of the bounces seems to indicate a weight somewhere between those two, however.
Basic ball bouncing with no squash and stretch.
After this, we learned about animating using a hierarchy of objects. The ball model was made the child of two parented groups. The highest parent was used to control transform, its child to control rotation, then its child (which was the ball model) to control scale. This allowed for the rotation, scale and position of the ball to be controlled independently.
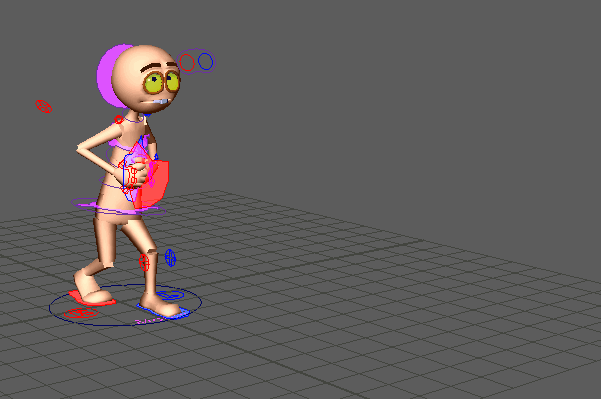
For homework, and as part of Assignment 2, this ball model was then animated to bounce around a scene containing basic walls and obstacles. You can see the playblast to the right. Notice the squash and stretch in the direction of motion and impact, i.e. the ball will compress vertically when hitting the flat ground and compress horizontally when hitting the wall to the right. This is achieved using the various levels of control offered by the hierarchy of groups created in the Outliner window. It took some time to adjust the timing and height of the ball’s bounces to make it feel appealing and believable.
Bouncing ball with walls, rotation and squash & stretch.
Week 3
02/08/2021 - 08/08/2021
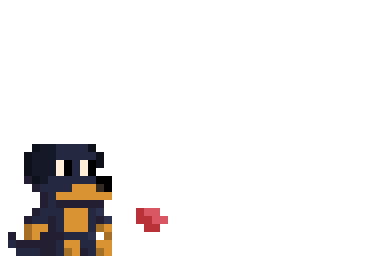
This week we animated a basic fox character. This character is a small ball with ears and a tail. It has handles to apply vertical squash and stretch to the body and handles to bend the tail segments independently. The goal of the animation is to use the 12 principles to animate the character as if it were a video game character jumping around a level.
When animating, I started by keyframing the key positions of the fox. I adjusted these to get the timing of the fox on the various platforms feeling right. I then adjusted the animation curves in the graph editor to make the motion a bit more realistic. Once this was done, I added squash and stretch to the character’s body and added rotation to add some anticipation to the jumps, along with some follow-through of the body as it came to a stop.
Finally, when that was all looking good, I animated the tail. I focussed on animating the segments with overlapping action so the tail appears to be dragged around by the movement of the body. While keeping the overlapping action in mind I also added follow through. You can see this most notably when the fox turns around or lands from a jump; the tail continues with its velocity beyond where the body stops.
Ball Fox character jumping around a scene with squash/stretch, anticipation, follow through/overlapping action.
After working on the fox for most of the lesson, we had a quick look at making a shark model follow a predefined path. A lattice was placed around the shark to let it deform more believably while following the path. We were also shown a quick introduction to adding scripts to drive a rig using code and logic.
Week 4
09/08/2021 - 15/08/2021
This week we looked into the basic rigging of a toothbrush model using deformers. This involved adding a Squash deformer to control squash and stretch, adding Bend deformers to control the tilt and nodding actions of the toothbrush character. We also looked at the flare deformer.
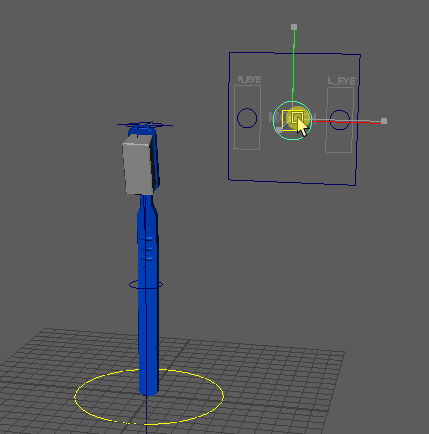
After setting up the hierarchy with these controls we added a circle to the base of the toothbrush and looked at how to control the translation and rotation of the toothbrush using this object as a controller. This involved the Connection Editor window to link the values of the circle and the toothbrush together.
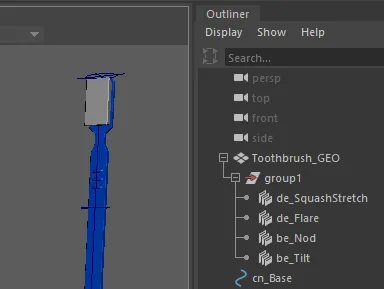
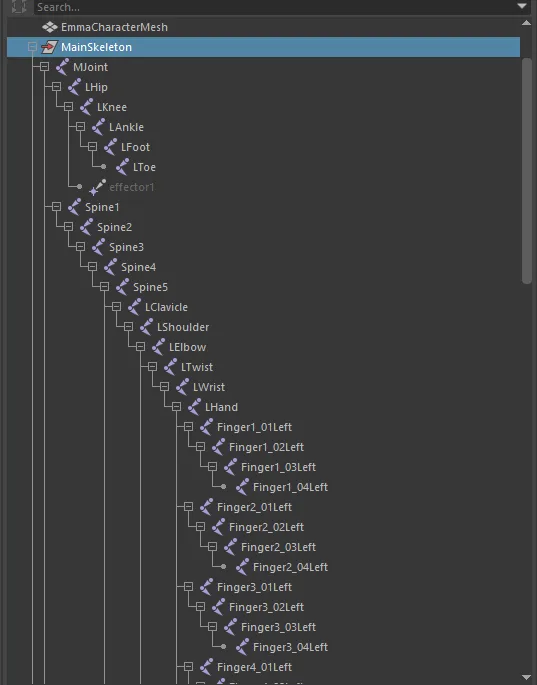
Hierarchy of the toothbrush rig.

The Set Driven Key window. Here the TranslateY is being keyed to the Curvature property of the Nod Bend deformer.
Gif showing the controller being used to deform the toothbrush.
Then we imported a premade controller object and set it up to control the basic deformer rig that has been created. We connected the control box to the Tilt and Nod deformers using the Set Driven Key window. This window allows you to link a Driver object to a Driven object by keying different values together. We keyed the TranslateY of the centre circle on the control box to the Nod bend deformer on the toothbrush in such a way that pulling the circle down made the toothbrush bow forward and pushing the circle up made the toothbrush bend backwards. Similarly, the TranslateX property of the circle was keyed to the tilt of the toothbrush using the tilt bend deformer. You can see this in the gif below on the left.
After this Leo showed us how to make a similar controller using the Node Editor window. This uses a visual collection of nodes to map and create relationships between the properties of different objects. I like the node editor more as it has less room for human error like the Set Driven Key window, which relies on you choosing the right objects for both the driver and driven, setting correct values to be changed and changing them to acceptable values (i.e. What degree of nodding should be keyed). There’s also no easy way to see what has been keyed and in what way after you have done it from what was shown (EDIT: I have found that you can see and adjust these keyed values using the Graph Editor window! That makes this method a bit more manageable.). The node editor seems to show the relationships clearly and seems more suited to complex relationships that would become unwieldy if done using the Set Driven Key window.
Week 5
16/08/2021 - 22/08/2021
This week we looked at rigging a model using a skeleton and how skeletons should be set up for standard biped characters.
Some interesting points:
The arm has a joint in the middle of the forearm to give the ability to twist.
The heel stays higher than the base of the foot and toes.
The knee and elbow should be bent slightly for Maya to correctly add IK.
It is good practice to name all of the joints. They’re not required to be named L and R for flipping across the body like in Blender. Names are important however for scripting so that they can be referenced, and just for readability and maintainability of the rig.
Need to remember to orient joins after you’ve finished creating the skeleton.
I completed the rig for the character model by watching the provided videos after the tutorial as I wasn’t able to follow along with the live demonstration. It seems a bit fiddly to get things set up initially. It would be useful if you could flip the IK handles like you can with the joints. That would save you having to recreate them on both sides. Moving the IK handles around after binding the joints to the mesh seems to work properly. The arms might be a bit twisted as it’s easy to move the arm in ways that are possible but the IK causes the hands to be facing with the palm outwards at a strange orientation. It’s still something the human body could do, it’s just not how you’d usually hold your hands if your arm was in that position. This might just be something you have to animate/position manually using the arm twist.
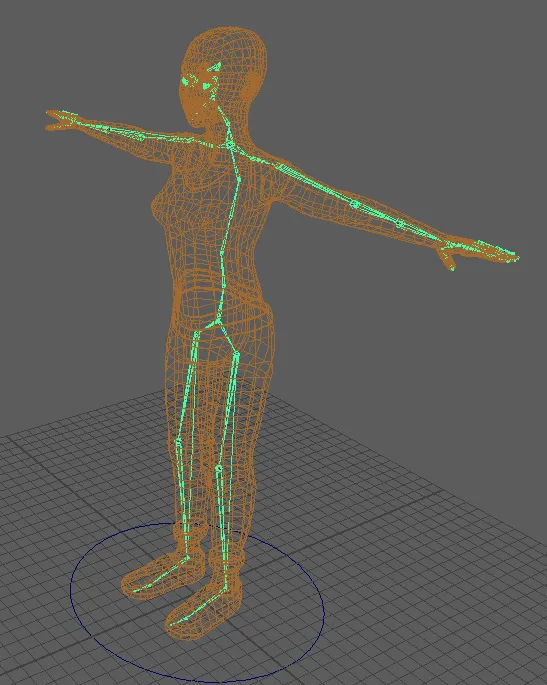
Provided character model rigged using a skeleton of joints.
I also went back to last weeks content with the toothbrush and made sure I understood the deformer rig properly. I adjusted the controller to include a control for the twist/head turn of the toothbrush character. I also added text to label each part of the controller. Finally, I adjusted the set driven key values of the controls to give more room to do exaggerated movements.
WIP animation of the toothbrush deformer rig.
I started blocking out the movement for the animation I’m going to add to the toothbrush. I’m going to make it jump forward, jump to the left then right quickly, then anticipate a large jump backwards. When it lands it will land on its back and act completely rigid and bounce around a little bit, like if you dropped a toothbrush onto the floor.
After animating it jumping around and falling, I wasn’t happy with the result. The small rigid bounces on the ground when it fell over it looked good but otherwise, the animation felt a bit boring. I decided to add a wrecking ball swinging in the scene that the toothbrush gets hit by to cause him to fall over. The swinging of the wrecking ball is driven using an expression to drive the object’s rotation according to the expression:
WreckingBall.rotateZ = sin(2.5 * time) * 60
The sine function is used to move it back and forth smoothly, the 2.5 inside the sine function speeds up the swinging motion. The 60 causes it to swing between 60 and -60 degrees to the left and right.
Week 6
23/08/2021 - 29/08/2021
We looked at skin weighting/ weight painting. Leo says this is the least fun topic in this course. I thought it might be difficult so I watched the video’s he had provided ahead of the class. It doesn’t seem too difficult, more just time-consuming and takes a lot of tweaking of weights and values to get things working as you intended.
In class, we were provided with the head of a character and had to rig it with joints, bind those joints to the mesh and paint skin weights so we could open the mouth without other parts of the head deforming unrealistically. I was able to get familiar with the weight painting controls quite quickly and get used to the workflow. This is what I was able to achieve by the end of the class.
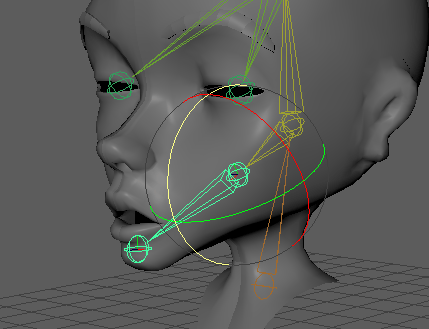
Opening and closing the mouth by rotating the jaw joint. The weight patining allows it to only deform the jaw and to stretch the lips smoothly.
Outside of class, I cleaned up the bouncing ball animation by adjusting the timing of the first bounce to take slightly longer to make the ball feel a bit squishier. I also tried to do this to the second bounce where it first hits the lower floor but it felt like it was sticking there for too long so I reverted it to only be on the ground for a single frame.
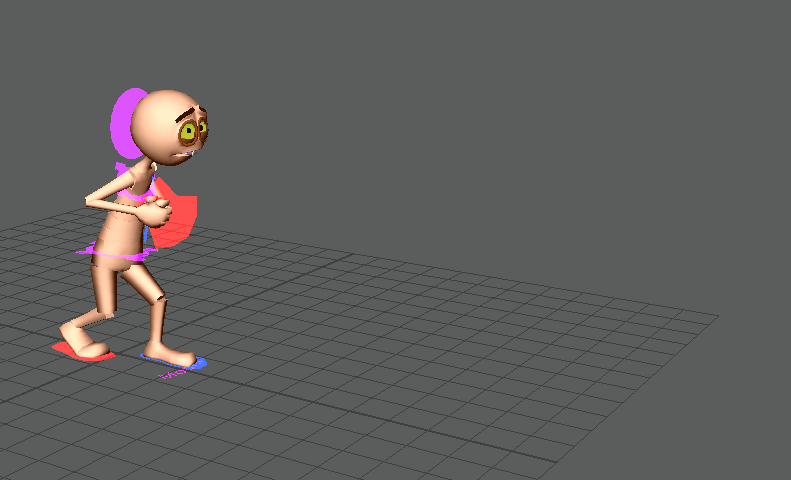
Final animation of the ball bouncing around a simple scene for Assignment 2.
I started cleaning up and improving the ball fox animation from week 3 as it’s due as part of Assignment 2. I added a moving platform for it to jump to around the middle of the animation, rather than having him perform a type of mid-air double jump. I also added some extra animation after he does the final backflip to make him do two small hops on the ground while facing the camera in celebration.
I realised while cleaning up the fox animation that I used pose-to-pose animation for the primary character movement and rotation, then went back and did straight-ahead animation for the tail to make it “flow” based on the body’s movements. This is also how I worked while adding the small celebration jumps at the end of the animation.
Final animation of the ball fox character for Assignment 2.
Finally, I cleaned up the toothbrush animation to give a bit more weight to the impact of the wrecking ball. I did this by making the character fly slightly farther and a bit faster. I also sped up each of the jumps the toothbrush makes and now it feels less floaty.
Final animation of the toothbrush character interacting with an object for Assignment 2.
I’m quite happy with what I’ve produced for Assignment 2. I think I’ve developed a good understanding of the 12 principles of animation and can navigate Maya without too much difficultly. I think I still need to work on making the animations more appealing by choosing more interesting actions for the animated characters to perform. I’m looking forward to using more advanced rigged characters in future assignments so I can add more personality and character to the things I’m animating (e.g. I wanted to make the fox’s ears bend and flap as he jumped but the model wasn’t rigged to support that).
Week 7
30/08/2021 - 05/09/2021
This week was a lecture week covering blocking and staging. Blocking involves planning a scene by placing characters and objects in various positions to create a feel for the scene. This is then expanded upon with fluid animation to create the final scene. The positioning and movement of cameras for framing shots should be considered as it offers an extra dimension with which to add character or meaning to a shot or scene.
We looked at progression reels for Pixar, Zootopia and Rio 2 to see how the animators build a shot. They started with reference videos and acting to get a feel of timing and any actions or movements that could be important. This is used to block out the character’s positions within the shot before splining the animation and polishing it to the final result.
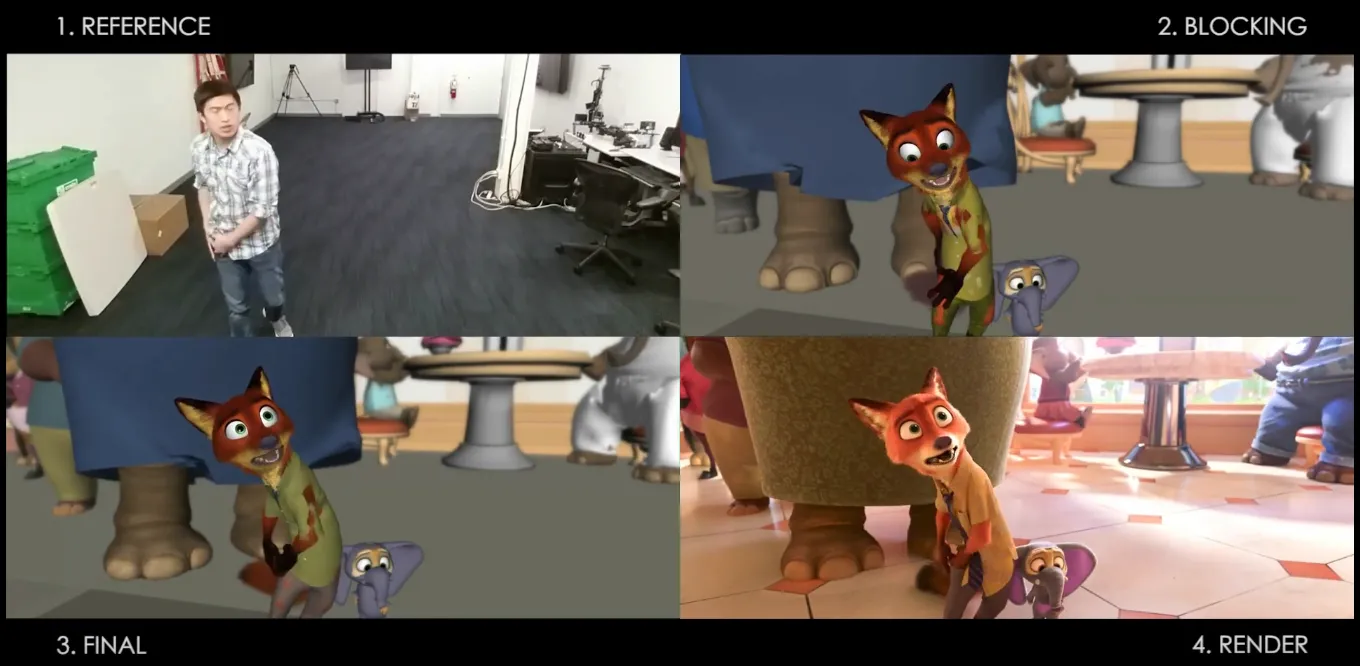
Progression reel of a scene from Zootopia. (source)
Week 8
06/09/2021 - 12/09/2021
This week we were shown the basics of animating a biped walk cycle. Next, we were shown how facial animation works. Using the Shape Editor window you can set up the facial features and control them using sliders. You can set them up with expressions such as smiling and frowning, and you can set up the mouth with phonemes or visemes. These are then animated to make the mouth match an audio track.
Outside of the lecture, I started animating the Moom stylised walk for the next assignment. I've chosen to animate a scared, careful walk where the character is walking slowly and looking around as if he’s walking alone through a haunted house.
I animated the walk on the spot and used the Curves > Pre Infinity and Curves > Post Infinity options in the Graph Editor window both set to ‘Cycle’ to make any repeated walking movement cycle automatically. It was a bit of fiddling to make it loop cleanly and understand where to put the keyframes so it would loop nicely if some aspects of the movement were offset from each other. By moving the feet moving along the ground at a consistent speed, I can measure how far they move in one frame, and move the entire rig forward by that amount per frame to see the character moving through the scene.
Rough walking animation with the Moom character.
With the main parts of the walk looping automatically, I can animate the head separately so it breaks the repetition of the walk, with his head moving around at a different rate to the walking/steps. This makes the character's movement more interesting. I gave the character a scared expression and made him look around as he walks.
Moom walk with some head animation and more exeggerated motion.
Rough running animation with the Cody Dog character.
After having a break, I had a go at animating the quadruped walk cycle. I decided to do a run rather than a walk which I hope is alright for the assignment. I had to smooth out some of the weights on the character’s mesh as they were very sharply painted and this caused a lot of edges and points in the mesh as the legs moved.

Updated animation with more movement and faster run.
On Friday I came back to the dog running animation and cleaned it up. I made the legs reach further to make the run feel more natural and less stiff. I also looked at some reference videos of dogs running and noticed how the feet follow through behind as they start to lift. It seems obvious but I had made the feet begin moving forwards right as they left the ground. Making this change instantly made the run feel more natural. There are still areas to clean up such as the bend of the back feet, the follow-through of the tail and maybe some more weight painting.
Week 9
13/09/2021 - 19/09/2021
Before the lecture, I spent some time on the dog running animation. I got the tail moving nicer, moved the front feet forward more and animated the rotation of the feet. I adjusted the scale and proportions of the dog character, making his head smaller, and his legs longer.
Polished version of the dog running animation.
In the lecture, we looked at animating the dog character. I spent this time weight painting the dog rig to remove more of the creases and sharp joints. I’ve got it to a stage where it’s smooth now. After this, we went over the facial animation and blendshapes in more detail. We saw how to add audio to the timeline so we can easily animate the facial movement to it (Right-click timeline > audio > import audio). After the lecture, I set up the dotty head rig with phonemes. I haven’t started animating it to audio yet as I haven’t decided on a piece of audio yet. It has to be something that I’m ok with hearing many times over as I animate to it.
I also started to animate the flour sack with stepped tangents. I’m making the flour sack do a high jump. I had to look at the reference video to see the motion and twist of the body during a high jump and it seems a bit challenging but also interesting to animate.
Rough, stepped tangents version of the flour sack high jump animation.
Semester Break
20/09/2021 - 03/10/2021
Week 1
Over the break, I started working on the facial animation for assessment 3. I used the rig created in week 6 for the Dotty character head and I’d already done weight painting around the jaw. I originally chose to animate speech for a voice line said by the character Wheatly from the game Portal 2. It was 15 seconds long and after animating the first few seconds I decided it was too long when we only need to animate 6 seconds/150 frames. After this I found a short voice segment to animate from an Aunty Donna comedy sketch called “Teacher Holds Back Class at Lunch”.
Week 2
I worked to complete the custom rigged character this week and to start polishing up most of the other projects for assessment 3.
I watched the more advanced rigging tutorials provided by Leo, following along to improve the manual rig. I implemented:
the reverse foot joint structure.
animation handles/controllers to the clavicles.
elbow twist controllers.
wrist controllers that control the position of the wrist and the orientation of the hand/wrist.
a neck controller to turn the head while walking so it wasn’t fixed with the body.
a controller to twist the spine above the hips but below the chest.
a hip controller.
a mouth controller and did weight painting to make it so you can open the mouth nicely. With the way the joints in the head are created, the mouth controller just moves the joint on the chin up and down, rather than rotating a joint further into the head to open/close the jaw.
Near complete playblast of custom rigged character walking.
I also added a finger control to the pointer finger on the left hand but then decided not to add it to the rest of the fingers as it’s not overly important for a walk cycle, and I also now understand how to do it to all remaining fingers, should I ever need to.
I implemented the arm-twist to the left arm but I couldn’t get it working properly for the right arm. Whenever I added the expression to make the right arm twist’s X rotation equal to half of the wrist’s X rotation, it would constantly change and flicker between a range of values (even if nothing in the scene was moving or being changed). This causes the arm to twist constantly whenever the hand moves (not even when it rotates!). I tried for about an hour to figure out what was wrong and why the right wrist had some crazy rotation but I'm putting it down to gimbal lock or something that broke when I originally flipped the joints when making the skeleton. The only other thing I noticed is the x offset of the right wrist joint is the same value as that of the left wrist joint, while all other joins on the right arm have the same x position but have a different sign (eg, x = 10 on the left arm and x = -10 on the right arm, but with JUST the wrist joint, x = 13.556 on the left AND right arms, even though it appears correctly mirrored and positioned). This might be causing its rotation to be calculated strangely. It doesn’t seem to affect anything else so I’ve had to just leave the twist rotation expression off the right arm.
Overall I’m a bit disappointed with how the self rigged character turned out. I forgot to freeze some of the controller object’s transforms so they have strange positioning, rotation or scaling, where 0,0,0 isn’t their “origin” but is instead somewhere relatively random. I know the rotation of the neck/head controller isn’t frozen properly, so “forward” for the neck/head controller isn’t at a y rotation of 0 but some arbitrary number like -5 degrees. I only found most of these issues after I began animating, and all of these issues made animating much more tedious and unintuitive. I think the animation looks fine, just that the rig is not as good as it could have been. I’ve learned a lot though and if I were to do this again I now have a much greater understanding of what needs to be done to create useful controllers for animation.
Another thing that I think I could have done better is the weight painting around the shoulders. When bending the arm backwards the shoulder shrinks unnaturally. I tried for about half an hour to improve it and it’s definitely better than it was, but it still could be better.
In other progress, I finished the stylised walk with the Moom character. I added movement to the hands so he looks like he’s nervously fidgeting as he walks. I also made him raise his feet higher, added some forward and backward movement to the body, and made him lean over further to help the vibe of a cautious, careful walk. I would have slowed the pace of the walk even more but I’ve done too much polish and fine adjustments that it’d be too difficult to do such a drastic change at this stage.
Final version of stylised Moom character walk.
WIP smooth version of flour sack character animation.
I worked more on the flour sack animation. It took a bit of rework and retiming from the initial blocked version but now it’s starting to come together. There’s still a lot of room for adding expression and refining the motion and movement of the character.
Week 10
Public Holiday (No class)
04/10/2021 - 10/10/2021
I polished the speech animation by adding some more expressions and using them during the animation. I’ve included some to move the head around the eyes to give an angry or exclaimed expression as the head is speaking, along with some to open and close the eyes. I also adjusted some of the mouth movements towards the end of the animation to make it feel smoother and less snappy. I could tidy it up more but I’m happy enough with it and it’s reached the point where any more changes would be barely noticeable from how it is currently. I also found that you can view and edit the keyframes created by the shape editor in the graph editor. I had assumed this was possible previously while working on this scene however I could never get anything to show in the graph editor. I mustn’t have had the right object selected.
Final version of speech animation.
Creating the playblast mp4 file was painful for this animation. Something about how Maya includes the audio in the exported avi file does not like to work well with other programs. To convert the exported avi files to mp4s, I usually use a program called HandBreak. However, with this avi file, it would crash when I started the export. I tried to use VLC to convert the avi to an mp4 and it would just stop the export immediately and produce an empty file. I was going to try an online converter, however, Maya’s playblasts are several hundreds of MB in size, and the upload speed where I am is terrible so it’d take about an hour to upload the playblast. What I ended up doing was using HandBreak to remove the audio from the avi, and that allowed it to export the video with no problems. I then used the Windows 10 Photos app to add the audio file back into the now silent mp4. This produced the final mp4 playblast file.
Final version of flour sack animation.
I also polished the flour sack animation by adding overlapping action to the tassels on the corners, and generally more movement to the different parts of the body. I’ve made it so at the end of the animation the sack sags off the end of the high jump landing pad, just to make it a bit more interesting.
While getting the assignment ready for submission, I noticed the custom rigged character walk looked a bit stiff. I went and added more swing to the arms, made the feet not pull up quite as high, raised the entire upper body so the legs weren’t as bent, and adjusted the head swing.
Final version of rigged character walk.
I’m fairly happy with my submission for this assignment. I think I could have done aspects of the manual rig better when creating the controllers. Looking back at the stylised walk, while it was fun to animate, I think it would have been more interesting if I’d done something a bit more exciting than a slow, scared walk. At least I’ve gotten practice doing a slow walk, a standard walk with the manual rig and a fast run with the dog character. I’m really happy with how that animation turned out. I’m also quite happy with the flour sack animation. It took a bit of time to get efficient at animating that rig since it’s quite different to anything else I’ve had to use. The speech animation was interesting. It was a bit tedious but also satisfying once you play it back and start to see it come alive.
Week 11
11/10/2021 - 17/10/2021
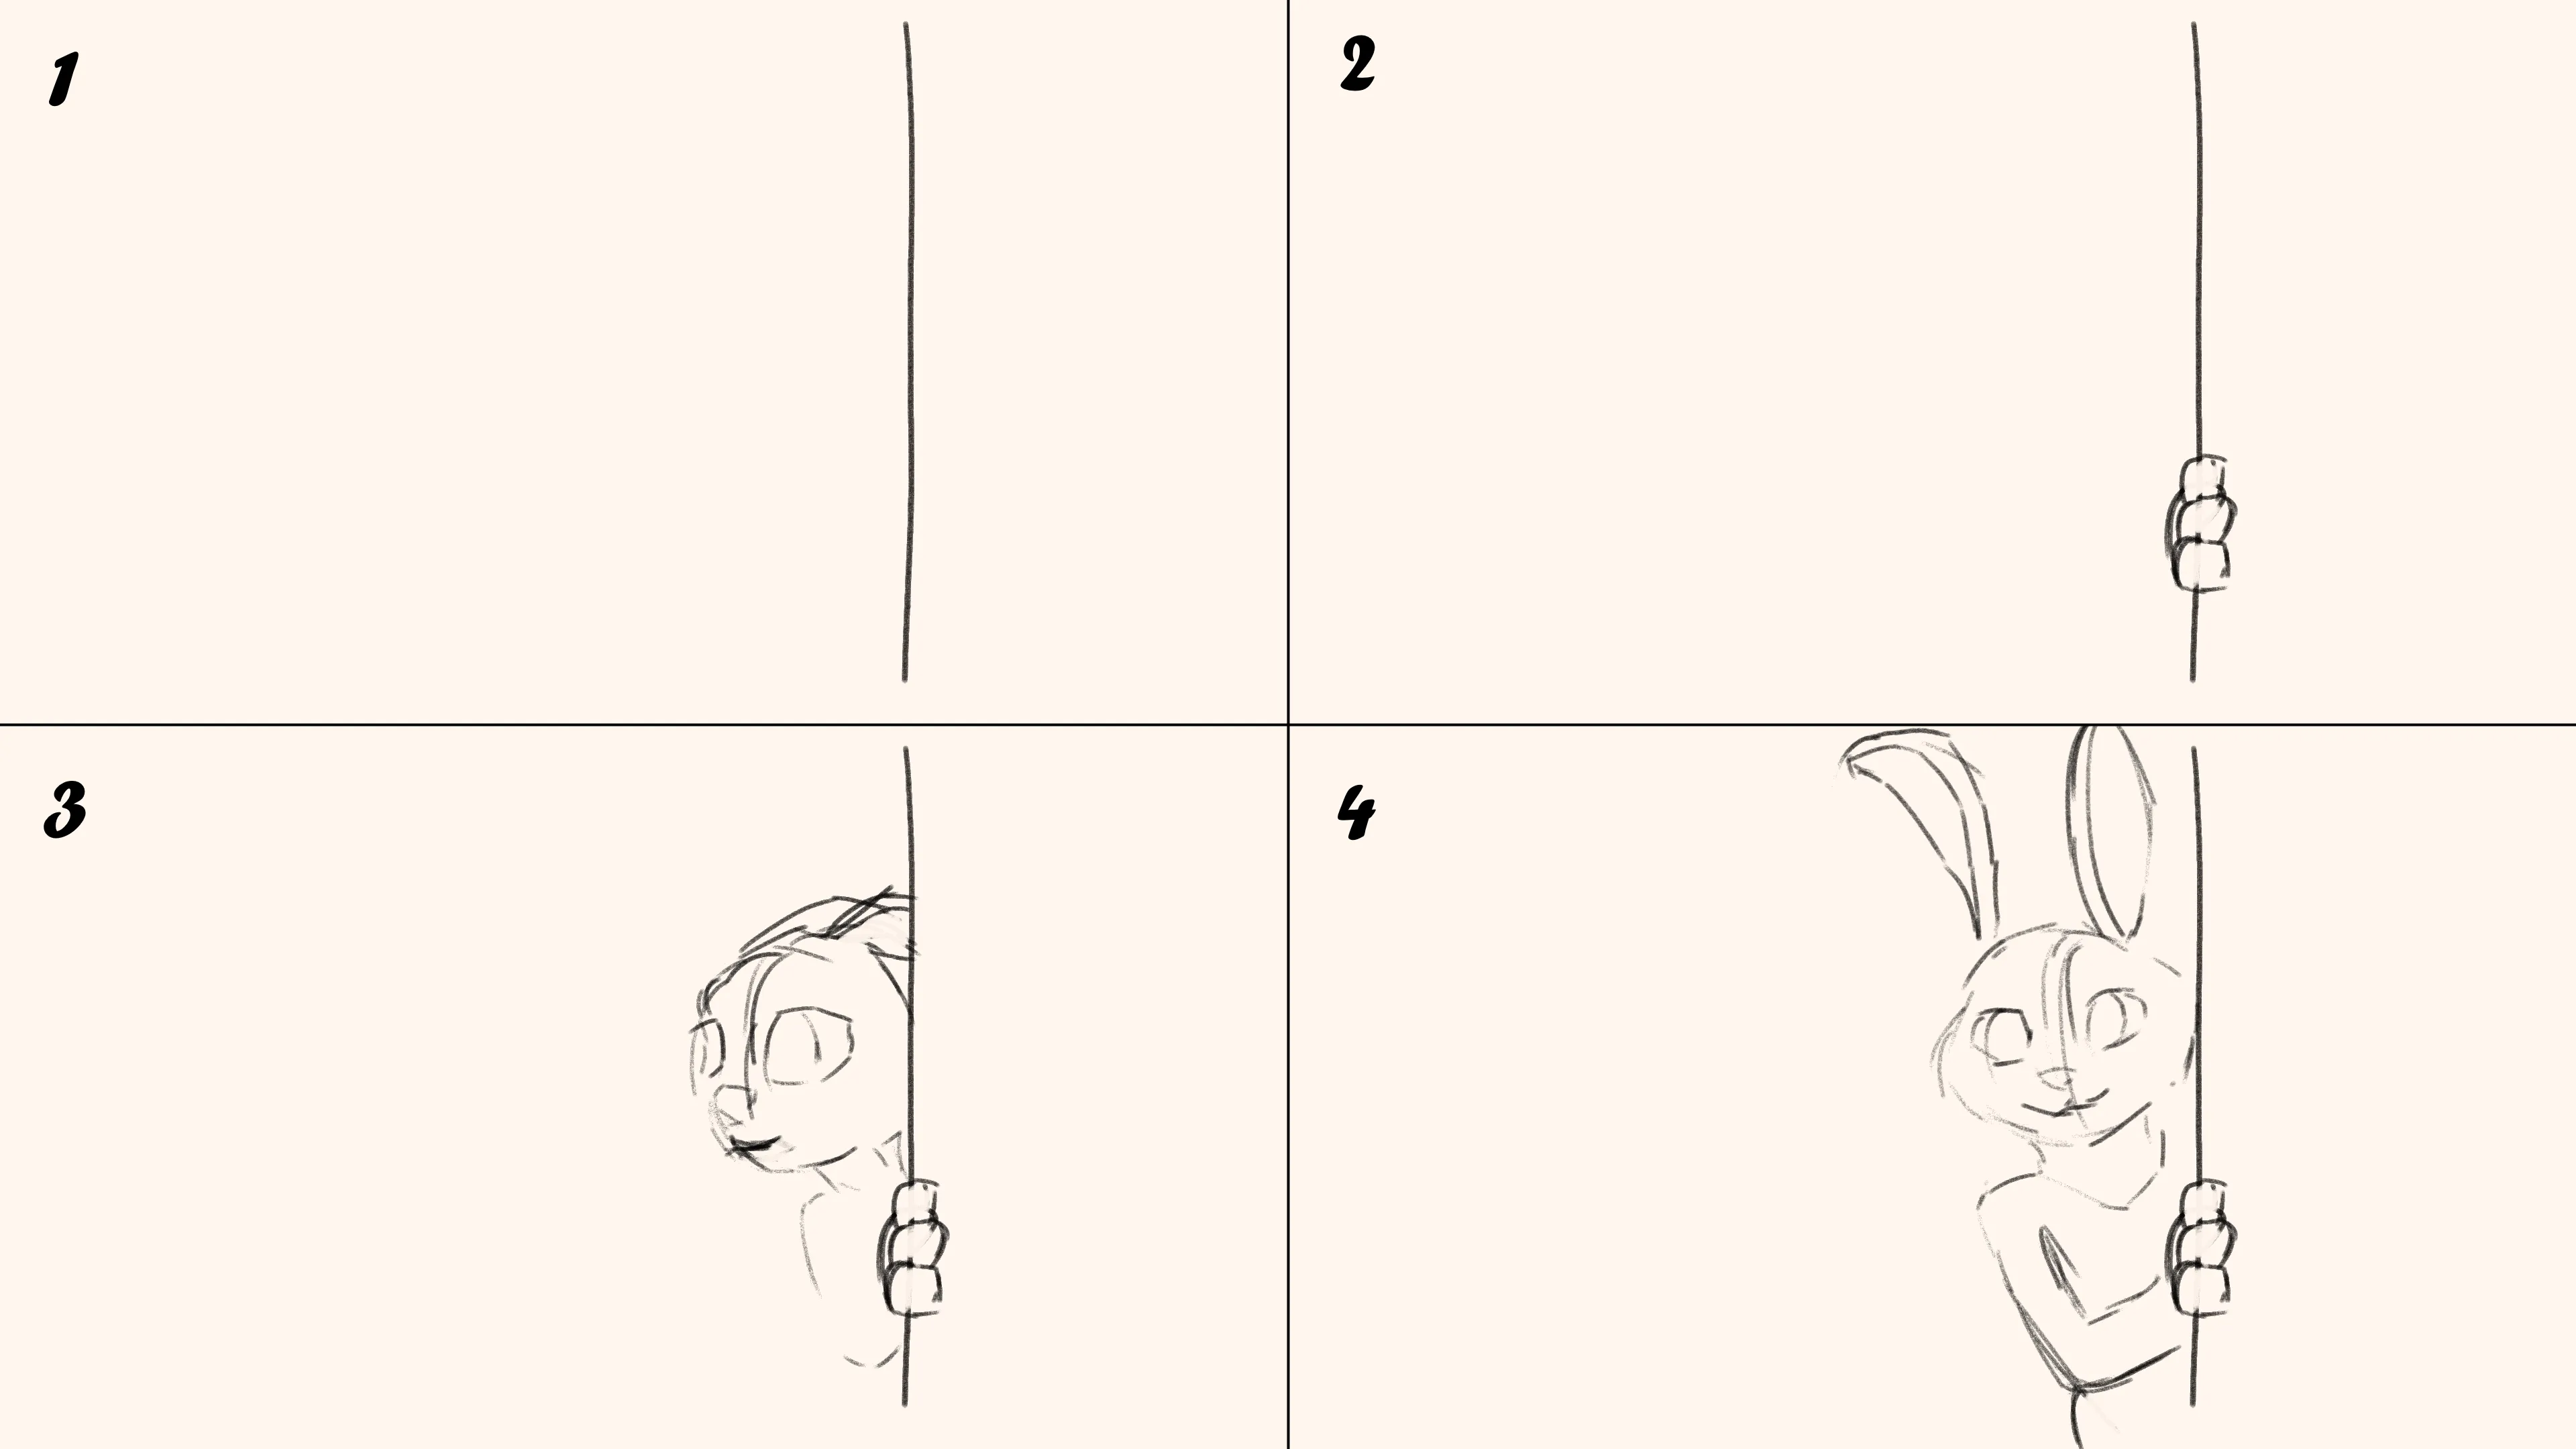
This week saw an overview of the next and final assignment. This involves the creation of a short animation about 15-20 seconds in length containing a provided character having a basic encounter of some kind. The character we can animate must be chosen from a set of rigged characters provided. I’m thinking of using the Judy Hops rig.
After this, we learned about the camera sequencer and how it can be used to create a set of camera shots. We were provided with an animated scene containing two characters battling. We were tasked with using cameras and camera sequencing to stage this fight from interesting and dynamic angles. An interesting point to note is how the camera sequencer works on a separate timeline, allowing shots to replay segments of the animation out of order or let the animation slightly overlap between different shots.
Week 12
18/10/2021 - 24/10/2021
This week I started creating the storyboard, animatic and blocking out the animation for assignment 4. I didn’t spend much time on the storyboard as I only have an old surface pro to draw digitally on, and I’m not that great at sketching anyway. I made enough drawings to get a general feel for what I wanted to animate then I compiled them into an animatic to get a feel for the timing. I spaced the images out generously and it came to around 30 seconds, which is a bit long for this assignment. I think it will be shorter in the final animation, and if not, there are a few sections of the animation with little movement that require some time to play out, such as one section where the character is standing and thinking.
The first four frames of the storyboard.
I started blocking the animation using the character in Maya, basing the timing on the animatic. I built a small, simple scene using primitives and scaling them to form walls and different objects.
First version of the animatic.
The story for my animation is going to follow Judy Hopps trying to track someone/something, and she is led into an alleyway. She has to get through but there is a wire fence blocking the way. The fence has a door, but she assumes it is locked. She pauses and looks for a solution to get over the fence and she devises a plan to climb and jump from several objects and ledges in the alleyway to clear the fence. She does this but just as she is clearing the fence she accidentally bumps something from a ledge, which falls onto a plank of wood leaning against the door to the fence. This knocks to door open, revealing that it wasn’t locked and she could have just pushed the door open, rather than jumping over it. She then sighs and looks unamused, before continuing down the alleyway.
Week 13
25/10/2021 - 31/10/2021
I’ve finished blocking the A4 animation and the timing feels pretty good. After saving the blocked animation as a separate scene I began smoothing it out. I’ve found attributes on the hand and feet IK controllers that change the mode they operate in from world to local/parented. When I need the hands to touch something, for example, I can set them to be in world space, then when I want to animate some motion relative to the body, I can change the setting and key the position relative to the body. I also found a similar setting for the elbow and knee direction controllers; they have a mode that will set their position based on the location and orientation of the shoulder and wrist or ankle and hips, respectively. This greatly reduced the difficulty of animating the rig, as most things are now tied to the main body controller’s position and rotation.
Blocked animation for assignment 4.
In smoothing out the animation, some timing issues became clear. There was nothing too major, but the timing of most things needed to be shifted to be slightly longer or shorter. It all mostly balanced out, with the whole animation only becoming slightly longer.
I’m still going through and adjusting large parts of the animation but it’s almost at a stage where I can start animating smaller details like the hands and fingers, eye movements, facial expressions, overlapping action on the ears and arms and adding more bounce to movements.
Week 14
01/11/2021 - 07/11/2021
I’ve continued to polish the animation, animating more intricate things like the overlapping action of the ears and tail. I’ve added facial animation to the scenes where we see Hopps’ face and it adds a lot to the feel of the character. I grabbed some textures and put them onto some of the walls and other scene assets and added some lights to make the scene appear a bit nicer, even in playblasts. Finally, the camera has been adjusted to be a bit closer or have some slight movement on cuts to support the motion of the character.
Final animation for assignment 4.
It's been really fun to freely animate something like this. I went a bit over the recommended length of 20-30 seconds but not by too much. The extra time was mostly spent on the closeup at the end. There are still things that could be improved, namely the running towards the start. It still feels a bit rigid to me but it’s only on screen for such a short time and it’s only seen from far away so I think it’s fine. It would have been helpful to explore the rig a bit more before I started blocking as there were several controls that I didn’t know about when I did the blocking that I was able to use during the final animation. These made animating parts of the rig much easier, like the “Curl” on the ears or the setting to have the knee/elbow controllers move relative to the body.
Even with all of that, I’m really happy with the result. This course has been interesting and I’m sure I’ll be able to apply what I’ve learned to projects I work on in the future.
Looks like you've reached the end!
Return to top